- Home Page
- Adult Birthday Cake Ideas
- Handbag Cake
Designer Handbag Cake Tutorial
I made this designer handbag cake as a gift for a lovely lady who loves this type of handbag. This bag was inspired by the Louis Vuitton Alma bag. I took some pictures of the process and here is a quick tutorial of how I made this purse cake.
This post may contain affiliate links, which means I'll receive a commission if you purchase thru my links, at no extra cost to you. Please read the PRIVACY POLICY AND DISCLOSURE for more information.

Would you believe I made this cake a year ago and the lady simply refused to cut the cake and just kept it in her freezer? It’s still there to this day and whenever she has guests over, she would show off the cake and place it back to the freezer. I eventually made her cupcakes the same flavor as the cake so at least she can have her cake and eat it too!
Handbag Cake Tutorial
First
I baked the cake in an 8” round cake pan.
I used the super yummy Ultimate chocolate cake for this one. I then cut the cake in half and stick both together
with buttercream in between. I let it
stand on the flat side and place it in the freezer for about 15 minutes to let
it chill and set. It is easier to carve
a cake when it is a little bit frozen.

I then cut a small part on both sides of the cake to make it straight instead of rounded.

I carved
the cake so that it tapers to the top.

Then I frosted the cake with buttercream and placed it back in the refrigerator to chill.

I made the zipper with a zipper mold and some brown fondant and placed it on top of the cake.
Next I had the pattern printed on edible sheets. One tip, it is good to use fondant that is similar in color to the sheet. This way if the sheet starts cracking, as it would happen sometimes (and it certainly did for this project), the cracks won’t be too obvious. For this one the sheet was brown so I used brown fondant as well.
I rolled out the brown fondant slightly larger than the sheet. I brushed on a bit of water on the fondant, carefully peeled the sheet of the backing and gently placed it on the fondant. I then cut off the excess. For this size of cake one sheet was perfect for one side. If the cake is bigger, you will need more sheets.

I
carefully lifted the sheet and placed it against one side of the cake. I gently smoothed it out with my hands right
up to the zipper part.

I then cut off the excess with a paring knife, and passed the tracing wheel near the very edge twice to create an impression of stitches. Then I did the same thing on the other side of the cake.

Then I made some tan colored fondant using ivory gel food color and a little bit of brown. With the tan colored fondant I made what looks like a tag with a looped end. Just make sure when making the loops it is big enough to accommodate a fondant cord. I pressed a large round tip to make the rivets. Then I made the stitches again with tracing wheel.

To make the handles, I wrapped a log of fondant about 1/2" in diameter in a strip of fondant that has V-shaped ends.


I then looped the ends with the help of a lollipop stick. I also passed the wheel on where the stitches would be.

I flipped the handles over and brush a bit of water on the other side and carefully placed it against the cake placing the end just right below the looped tags on the cake. I used an extruder to make fondant cord and cut it to size and threaded one end of the cord to the handle and the other end on the tag.

I also covered the bottom part of the handbag cake with a strip of tan fondant. And I also made the tag with the same tan fondant.
To finish it off, I painted the rivets, rings and zipper with gold edible paint. And also painted some brown food gel color on the handle, where the folds would meet.
Lastly, I covered the board with embossed white fondant and added a red gumpaste rose.

And there we have it – designer handbag cake.
Hope you enjoyed this tutorial!
Til next time,

P.S.
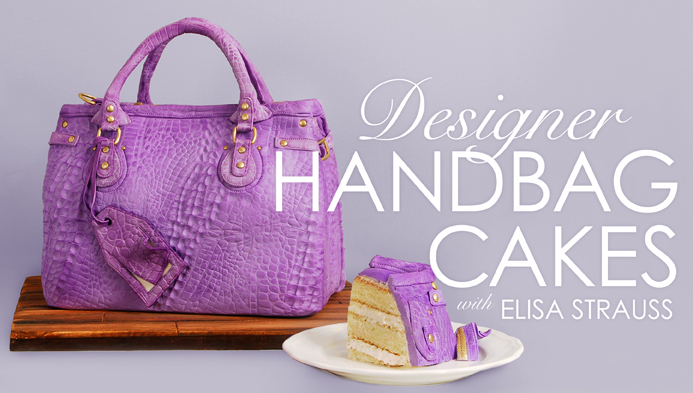
If you would like to learn more on making handbag cakes, here is a wonderful Craftsy tutorial by Elisa Strauss "Designer Handbag Cakes". This was the very first class I got from Craftsy and I love it because it is so detailed. (Affiliate link)
You might also like:

- Home Page
- Adult Birthday Cake Ideas
- Handbag Cake
The images, tutorials and content on make-fabulous-cakes.com are protected by copyright laws. DO NOT distribute or copy the content without written permission. DO NOT edit, crop, or remove watermarks from any image or video. If you intend to use any of the text, templates or images within, it must be linked back to this site with credit given to www.make-fabulous-cakes.com. For questions contact us HERE.
Disclosure: Please note some of the links in this post may be affiliate links, I will earn a commission if you decide to make a purchase. This doesn’t cost you anything additional and I truly appreciate this support, thank you!

Hi, I'm Darlene. I'm the creator, photographer, baker, recipe tester of Make Fabulous Cakes. Welcome to my sweet world!
MORE ABOUT ME >>
most popular posts
 |
 |
 |
 |
 |
 |
Recent Articles
-
Russian Piping Tips Guide plus Video
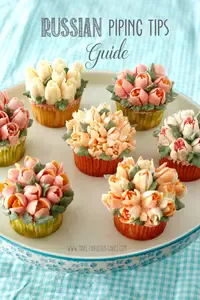 Russian Piping Tips Guide - a guide on how to use these fun tips, where to get them, which buttercream to use and how to color it plus video.
 -
Top Ten Cake Baking Tips
 Top ten cake baking tips for better cakes.
 -
Fabulous cake decorating ideas, Recipes and Cake Pictures.
Cake decorating ideas with lots of cake tutorials, cake recipes and inspiration for beginners and the more experienced cake decorator.
online Classes

Featured in:
 |
 |
 |


