|


Russian
Piping Tips Guide
plus Video
- Home Page
- Cake Decorating Techniques & Tips
- Russian Piping Tips Guide
THIS POST MAY CONTAIN AFFILIATE LINKS, WHICH MEANS I’LL RECEIVE A COMMISSION IF YOU PURCHASE THROUGH MY LINKS, AT NO EXTRA COST TO YOU. PLEASE READ PRIVACY POLICY AND DISCLOSURE FOR MORE INFORMATION.
I finally got my hands on these Russian piping tips! I keep seeing them everywhere and honestly at first I was just really intrigued and curious, and that is why I got it.

So,
I played with the tips a bit and made a video using the different tips. I also show you in this video how to get the
two tone colors for the flowers. But I
will write all the details here on how to use these Russian piping tips/nozzles.
Seriously guys, you really can’t go wrong with these piping tips. There is a teeny tiny bit of a learning curve but it really is simple to use.
What are Russian piping tips?
Rumor has it these tips come from Moscow as the name implies but honestly I am not sure about the history of these tips. These pastry tips have intricately designed cut outs on one end of the tip unlike the regular pastry tips that just have holes (like the star, petal and the round tips). And the idea is that when you pipe it on, you will have a complete flower – petals, centers and all, in just one shot.

It comes with a variety of designs and each design will make a specific kind of flower.

One thing about these Russian piping tips is that they are HUGE. It is 1-1/2” high with the nozzle part at 3/4”. So it is best to use a bigger pastry bag and that you are ok to cut it bigger on where you insert the tip. Recently I have been using disposable pastry bags when I make buttercream flowers and I highly recommend it. I use the 12” disposable bags and it was good enough for me but you can certainly use bigger bags so that you can put more buttercream and refill less.
Another thing about these tips is that there are no numbers on them so the only way to distinguish them is by the design on the nozzles. With some designs, you have to look more closely as they can look the same at first glance.
Where to get it
When I started to look into buying these tips, I can only find it online on Ebay and Amazon and they usually come from overseas, which meant they would take a bit of time to receive it. But a couple of weeks after I ordered it, I saw more and more local cake supply stores are offering it. Some online stores like BakeDeco and How Sweet is That are selling them now too. I think it is cheapest to get it overseas however the trade off is that it can take a long time, up to a month, to get it.
It is usually sold in sets and the number of tips in the sets can vary from 6 up to 29 (or maybe even more!). I got the 7 piece set because like I said I was just curious. But now that I have tried it, and I look at the other sets, I am even more intrigued what the other nozzles will do.
Frosting and consistency
The trick to using this tip properly is in the frosting. The butter cream that I always use is Italian Meringue buttercream but you can use any type of buttercream that you normally use. Make sure that it is stiff and can hold up its shape and is not too soft. If it is too soft, the piped design will not come out properly and you will just have a dot of a puddle mess. And you don’t want that. If the buttercream is too soft, just place it in the refrigerator for a few minutes but make sure you don’t forget it or else you will get some hardened bits of buttercream. Take it out, give it a good mix, if it is still too soft, return to fridge, rinse, repeat until you get the right consistency.
How to use the Russian piping tips
Once you got the buttercream in the bag with the tip it is time for the fun part - piping! The way to pipe it is like piping a drop flower. Place the tip on a 90 degree angle on the surface of the cake or cupcake. Squeeze the bag until you build a nice base. Then pull the bag straight up releasing the pressure at the same time.


Make sure that when you start piping the buttercream it is adhering to the cake surface or else when you pull it off some of the petals that did not stick to the cake will pull off as well. I find that a frosted surface will make the piped buttercream adhere more so I very lightly frosted the cupcakes, just a thin layer though because the flowers will add more buttercream.
For the cupcakes, it is good to start in the
center with either one flower or a cluster of three flowers, then pipe the rest of the
flowers all around. When you start
playing with the tips you will see which ones would have smaller flowers and
with those you would make a cluster of threes; the bigger flowers you can have
just one in the center.
The long and short of it
And
I also discovered that some tips would make nicer flower when they are piped
short and some would be nicer when piped tall.
I find that the tips that have swirls, or swirly tips as I call them,
look nice when they are piped taller or longer; these ones look more like
tulips. These are the ones here below.


Then the tips that look like stars or have dots in the center, I find that they look nicer when they are piped shorter. In this way you can see the details in the center. They kind of remind me of blossoms, so I call them the blossom tips. You can still pipe them longer but the details get lost inside. Here are the tips below.


You can now get the tips individually below (affiliate):
 Russian Nozzle Piping Tip # 1 |
 Russian Nozzle Piping Tip # 4 |
 Russian Nozzle Piping Tip # 5 |
 Russian Nozzle Piping Tip # 10 |
 Russian Nozzle Piping Tip # 12 |
 Russian Nozzle Piping Tip # 13 |
Coloring the buttercream
You
can use just one color of buttercream like below to start with but what’s fun
with these tips is that when you start combining colors, the details pop out
more and it gives more dimension, like a real flower. I say experiment with the colors and find
which ones you like best. Here are a few ways that I played with to create
different effects.

Marbling
First and easiest way to create a two tone color is marbling the buttercream. You simply take two colors of the buttercream and give it a very light mix. Do not mix it all the way thru. Then place it in your bag and pipe away. In this method you will get random variations of colors.

It is what I did with this flower, although it is hard to see in this picture but there are striations of white with the pink.

Two-tones
Another method for two-toned colors is by taking one color and spread it all over the sides of the pastry bag then adding another color inside. It gives a nice depth of color especially on the inside. It is especially nice for the blossom tips because of all the details in the center.


For this flower I used white on the outside and pink on the inside.

And for this one I used pink on the outside and yellow on the inside.

Three-tones
Then I had fun with the colors and took the two tones and pushed it further to three tones. For this one I striped half of the bag with one color and another color with the other half. THEN, I added another color in the middle. I find yellow are nicest in the centers because most real flowers have yellow centers. Here is a sample below. I didn't get the chance to take a picture of the inside of the bag but shown here on the outside are the two colors.

I used orange and white on the outside, then yellow on the inside.

Striping
And
lastly, for this flower, I just added random short strips of color on the sides
of the bag with a small metal spatula then added uncolored buttercream. It just gave a nice touch of color on the
sides of flower but it is still mainly white.
I think this way of coloring is very pretty for the tulip looking ones.

I hope this guide will help you with using the trendy Russian piping tips. It was actually quite fun to use. A cake friend mentioned on Facebook that sometimes they can look all the same but it will be good for last minute orders or for fast cakes. It will look like you worked so hard on making them but really it just took you a minute per cupcake. Just don’t tell anyone the secret ;)
I like to use them as filler flowers in combination with regular piped buttercream flowers. My favorite ones are the tulip looking ones. So pretty!

So have fun with these tips and let me know what you think of them below in the comments.
Cheers,

Want to learn more Buttercream Flowers?
If you would like to learn more on making buttercream flowers, you can check the online class that I created, Make Fabulous Buttercream Flowers. It's a comprehensive video class that covers the basics from making buttercream, to making a variety of modern buttercream flowers to assembling the flowers on a cake.

Russian Piping Tips Guide Top
- Home Page
- Cake Decorating Techniques & Tips
- Russian Piping Tips Guide
The images, tutorials and content on make-fabulous-cakes.com are protected by copyright laws. DO NOT distribute or copy the content without written permission. DO NOT edit, crop, or remove watermarks from any image or video. If you intend to use any of the text, templates or images within, it must be linked back to this site with credit given to www.make-fabulous-cakes.com. For questions contact us HERE.
Disclosure: Please note some of the links in this post may be affiliate links, I will earn a commission if you decide to make a purchase. This doesn’t cost you anything additional and I truly appreciate this support, thank you!

Hi, I'm Darlene. I'm the creator, photographer, baker, recipe tester of Make Fabulous Cakes. Welcome to my sweet world!
MORE ABOUT ME >>
most popular posts
 |
 |
 |
 |
 |
 |
Recent Articles
-
Fabulous cake decorating ideas, Recipes and Cake Pictures.
Cake decorating ideas with lots of cake tutorials, cake recipes and inspiration for beginners and the more experienced cake decorator. -
Mushroom Birthday Cake
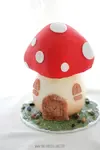 In this Mushroom Birthday Cake tutorial, learn how to create a whimsical, mushroom-shaped cake that's perfect for enchanting any celebration.
 -
Swan Cake Tutorial
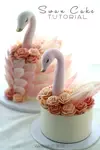 In this swan cake tutorial, you'll learn how to make a fondant swan head with buttercream roses and chocolate for feathers
online Classes

Featured in:
 |
 |
 |


