- Home Page
- Cake Decorating Techniques & Tips
- Wafer Paper Bunting
How to Make
a Blingy
Wafer Paper Bunting Banner
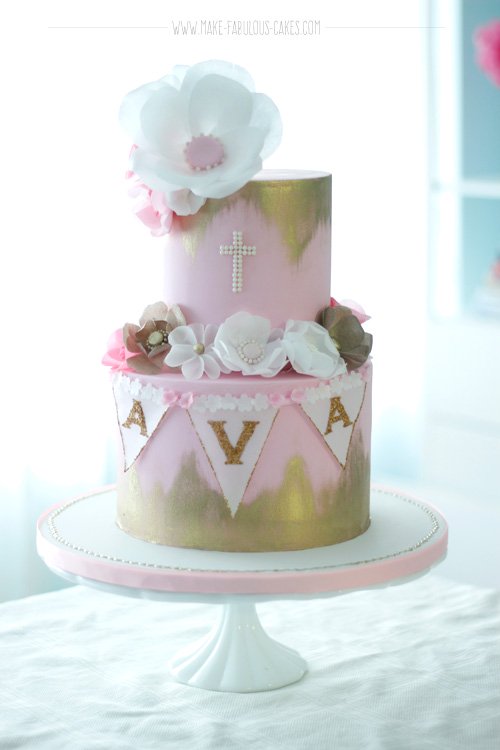
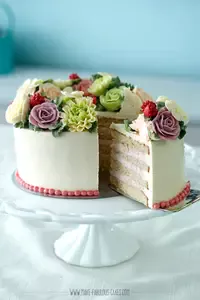
Here’s a tutorial on how to make an easy, blingy wafer paper bunting. I used this bunting in my previous cake – the glam baptism cake. This bunting banner would also be perfect to make wedding monograms are usually 2-3 letters long.
This post may contain affiliate links, which means I'll receive a commission if you purchase thru my links, at no extra cost to you. Please read the PRIVACY POLICY AND DISCLOSURE for more information.

My inspiration came from one of the concept photos for the party decorations. The picture was a real paper bunting with letters in gold. Since I was using edible wafer paper for flowers, I thought it would also be perfect to use it for the buntings.

As this was my first time using wafer paper, I was first concerned that the humidity would affect the wafer paper. The cake was going to the restaurant’s walk in fridge and humidity in those types of fridges can vary. I was relieved to see that the cake was ok the next day. The cake was in a box, I’m not sure if that help at all but it was a good protection from other things falling on it regardless.
How to make a Blingy Wafer Paper Bunting
YOU WILL NEED:
Wafer Paper
Pencil
Ruler
Scissors
Piping Gel
Gold Edible Glitter
Extruder(optional)
The size of the triangles will depend on how big the cake is and how many letters are needed. The cake I made was 8” and I just needed 3 letters, so I was able to make the triangles bigger.
To make triangles that are equal on both sides, take a piece of paper, fold it in half and make your measurements or you can just wing it and cut it without measuring.

For this cake, since there were only 3 letters, I thought it was fun to make the middle triangle longer. The other 2 triangles were 3” all sides. Add a 1/4” to one side of the triangle; this is going to be the top part of the bunting where it is going to be attached to the fondant rope.
Trace the template on the wafer paper with pencil* and cut with scissors.
*The core of a pencil is made out of graphite and not lead as we call it. Pencils do not contain lead which is toxic. Graphite, however, is safe and non-toxic.


Print out the letters to the size you need them. I used the Word program, typed out the name in different sizes and chose one that fits best inside the bunting. The font I used for this banner is Copperplate Gothic Bold. Trace out the letter on the smooth side of the wafer paper.

Take a small brush and apply the piping gel being careful to stay inside the traced letter.

Immediately pour the edible glitter on top of the bunting. Piping gel has a tendency to dry out if left too long.

Tap the excess back to the container. (It helps working on top of a piece of paper, this way you can use the paper to collect the edible glitter and pour it back in the container once done. )

Sometimes there are areas that are not covered by the glitter. Go and reapply the piping gel into those areas. Add more glitter on those areas and tap it out again.

If you want to have sharper edges, run a straight edge like a knife around the letters.

To add glitter to the sides of the triangle, apply piping gel on the 2 sides.

Then dip those sides on the edible glitter.

Ok, this part is optional. My first vision for this bunting was that it will hang on a piece of fondant rope. The end result however was that you can hardly see the rope. I still think the rope let the bunting hang nicely and gave it a bit of dimension.
To make this part, you can either extrude the rope or just roll a long snake of fondant.

Brush some piping gel where the 1/4” excess is and then carefully attach it to the fondant rope. At first the wafer paper may be a bit hard to manipulate but it will soften eventually with the piping gel.

When all the buntings are attached to the rope, carefully flip it over and apply a bit of edible glue or piping gel on the fondant part on the back and then carefully place it on the cake.
If you find that the top part is too wrinkly (like I did), you can cover it up with some decorative punched out wafer paper. I used a flower craft puncher on the scraps of wafer I had.
And there you have it, a nice blingy bunting to add sparkle to your cake!

Happy caking!

You might also like:
- Home Page
- Cake Decorating Techniques & Tips
- Wafer Paper Bunting
The images, tutorials and content on make-fabulous-cakes.com are protected by copyright laws. DO NOT distribute or copy the content without written permission. DO NOT edit, crop, or remove watermarks from any image or video. If you intend to use any of the text, templates or images within, it must be linked back to this site with credit given to www.make-fabulous-cakes.com. For questions contact us HERE.
Disclosure: Please note some of the links in this post may be affiliate links, I will earn a commission if you decide to make a purchase. This doesn’t cost you anything additional and I truly appreciate this support, thank you!

Hi, I'm Darlene. I'm the creator, photographer, baker, recipe tester of Make Fabulous Cakes. Welcome to my sweet world!
MORE ABOUT ME >>
most popular posts
 |
 |
 |
 |
 |
 |
Recent Articles
-
Russian Piping Tips Guide plus Video
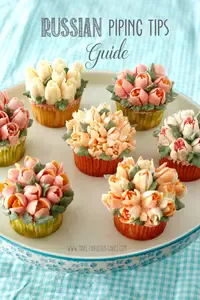 Russian Piping Tips Guide - a guide on how to use these fun tips, where to get them, which buttercream to use and how to color it plus video.
 -
Top Ten Cake Baking Tips
 Top ten cake baking tips for better cakes.
 -
Fabulous cake decorating ideas, Recipes and Cake Pictures.
Cake decorating ideas with lots of cake tutorials, cake recipes and inspiration for beginners and the more experienced cake decorator.
online Classes

Featured in:
 |
 |
 |


