- Home Page
- Baby Cakes
- Princess Crown Cake
Mommy
and Baby Princess Crown Cake
(How to Make a Pillow Cake)
This princess crown cake has not only one, but two crowns for the two princesses honored in a baby shower - one for mommy and one for baby.
This post may contain affiliate links, which means I'll receive a commission if you purchase thru my links, at no extra cost to you. Please read the PRIVACY POLICY AND DISCLOSURE for more information.

When I was told that the party was princess theme and that they wanted to have two crowns on the cake, I immediately thought of making a pillow cake. How much more regal can you get when you present a crown on a pillow?
I ran into some difficulty when I was making this cake. It was not because of the cake itself but rather what was going on outside my house. There were howling wind gusts up to 100 km/hr that night and it brought about a total black out in our area. It was dark and with only a few candles to give me light, I had to summon my inner ninja in able to finish this cake.
Although, thank goodness, everything went smoothly, making the colours was indeed challenging. I had readymade colours, and I would think that I got the pink one, only when I bring it near the candle, I would find out it was yellow! I really wanted this cake to be a soft pink, so I had to be extra careful in adding the coloring so I won’t get a bubblegum neon kind of pink. I was actually scared to see the cake in daylight the next day.
All in all, I was pretty happy in how this cake turned out. Mommy was pretty stoked too, which made all the working in the dark worth it for me.
I really wanted to make a video of how this cake was made from start to finish but with the black out, it was hard to film in the dark! I was able to film the carving and frosting part but alas the lights went out on me after that.
How to Make a Pillow Cake
With a little bit of carving, pillow cakes can be very easy to make. For this cake, I used 1 recipe of yellow cake and one recipe of chocolate cake and baked in 9” square pan.
 |
 |
 |
 |
I stacked them together with filling of raspberry buttercream in between and I placed a smaller cake board (7” square) underneath.
I started by carving each side of the cake on a 45 degree angle on both the top part and the bottom part of the cake. Then I just sort of smoothed out any sharp edges on the top of the cake. For the bottom part, I like the sharp edges on the each corner.
Then I crumb coated the cake with some buttercream to seal in the crumbs, there were a lot due to the carving. Then I added another coat of buttercream right away, no need to refrigerate in between. I find that with this type of frosting that I use, IMBC, if it gets too cold during crumbcoat then it starts sweating. Then the second layer sometimes just slides and won’t stick to the cake. I use clear plastic acetate to smooth out the frosting on the rounded top part of the cake.
I let the cake set and harden in the fridge for about an hour.
I then prepared the cake board. I spread some clear piping jelly on the board, rolled out some white fondant. I wanted the pillow to look like that it was set on fabric, so I made some creases and folds on the fondant while gently laying it on the board.
I covered the cake in pink fondant being careful especially when it came to the bottom part of the cake to avoid any creases. With the help of a ruler and a veining tool, I marked criss-crossing diagonal lines. To make the pillow looked quilted, I used the same veining to make cross marks on each point where the lines would meet. I then added a small pearl ball in the middle and made it stick with some edible glue.

I used an extruder and the clover shaped die to make two lines of piping and the bows for each corner of the cake. To create bow, I made the top loop part of the bow first and let it dry a bit. Then I made the tail separately and added that to the cake right away.
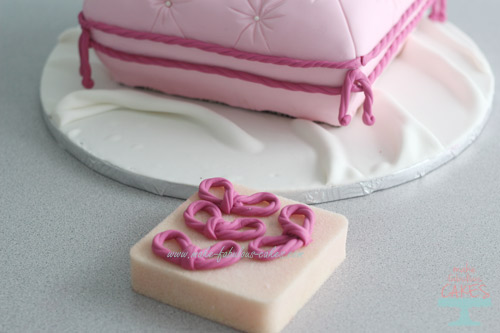

For the rattle, I rolled a ball of fondant and let it dry on a bed of cornstarch. Doing it this way will keep the shape of the ball rounded rather than having on side where it is resting to be flat. I extruded a plain long piece and twisted the top part. I let it dry separately. I used a blossom cutter to make the bottom part of the rattle where the handle will be attached. I used royal icing to attach the pieces. I also decided to make a small bow just to amp up the cuteness factor.
 |
 |
 |
 |
Then as finishing touches, added some rolled fondant flowers and leaves here and there.
I will write another post and possibly even a video on how I made the crowns for this cake. I use royal icing to stick the crowns to the cake.

And that is it, a crown cake fit for two princesses.
Hope you enjoyed this tutorial.
Sweet regards,

You might also like:
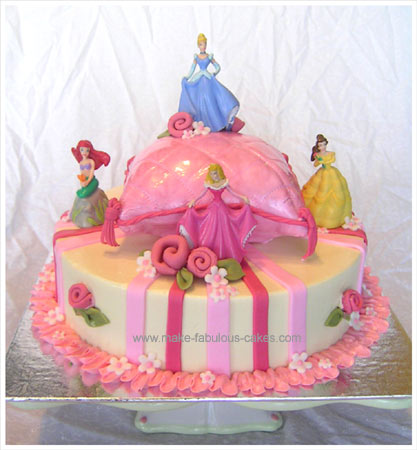
Princess Crown Cake Top
- Home Page
- Baby Cakes
- Princess Crown Cake
The images, tutorials and content on make-fabulous-cakes.com are protected by copyright laws. DO NOT distribute or copy the content without written permission. DO NOT edit, crop, or remove watermarks from any image or video. If you intend to use any of the text, templates or images within, it must be linked back to this site with credit given to www.make-fabulous-cakes.com. For questions contact us HERE.
Disclosure: Please note some of the links in this post may be affiliate links, I will earn a commission if you decide to make a purchase. This doesn’t cost you anything additional and I truly appreciate this support, thank you!

Hi, I'm Darlene. I'm the creator, photographer, baker, recipe tester of Make Fabulous Cakes. Welcome to my sweet world!
MORE ABOUT ME >>
most popular posts
 |
 |
 |
 |
 |
 |
Recent Articles
-
Russian Piping Tips Guide plus Video
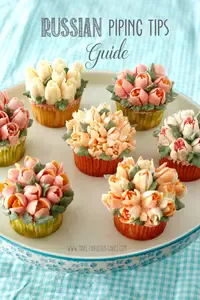 Russian Piping Tips Guide - a guide on how to use these fun tips, where to get them, which buttercream to use and how to color it plus video.
 -
Top Ten Cake Baking Tips
 Top ten cake baking tips for better cakes.
 -
Fabulous cake decorating ideas, Recipes and Cake Pictures.
Cake decorating ideas with lots of cake tutorials, cake recipes and inspiration for beginners and the more experienced cake decorator.
online Classes

Featured in:
 |
 |
 |


