|


Breakfast At Tiffany’s
First Birthday Cake
This post may contain affiliate links. Please read my privacy policy and disclosure.
My adorable niece turned one recently and as part of my auntly duties I have to make her first birthday cake. Her mom, my sister, is partner to Heartmuch Event Styling and her vision for her darling little one’s birthday party bash is elegant Breakfast at Tiffany’s meets pretty little Princess. The color scheme was of course, Tiffany blue, white, black, silver and touches of pink.

I love the movie Breakfast at Tiffany’s and I was mostly inspired by Audrey Hepburn’s chic fashion sense. Her iconic little black dress with tiara and pearls was the first thing that flashed in my mind when my sister mentioned she wanted to do that theme. So for this cake, I wanted it to have that elegant, modern, simple chic feel yet still girly at the same time.
I knew I wanted to incorporate rows of pearls with a brooch much like Audrey Hepburn’s character wore in the movie. On the top tier I used a pearl mold with gum paste to make the rows of big pearls and also the Wilton Jewelry Fondant Mold to make the smaller pearls. I also made the brooch out of gum paste and silver dragees.

Breakfast At Tiffany’s First Birthday Cake
My sister’s only request for this cake is for it to have a crown. To make the crown I used this mold as the base and gumpaste to make a base for the crown. And like a puzzle I connected the pieces together molded around a plastic container. Then I again used the Wilton Jewelry Fondant Mold to decorate and finish it.

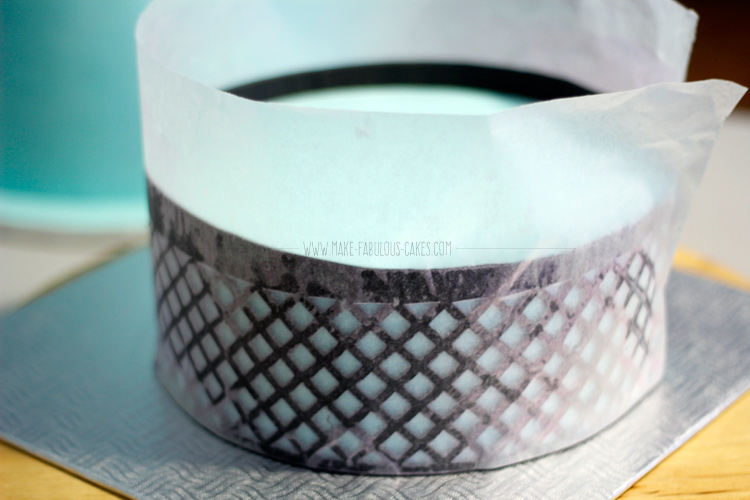
For
the middle tier, the cake 8" in diameter and 3” high. To make this pattern, firstly, I cut out a piece of wax paper the same circumference as the
cake. Next, I rolled out a long piece of
black fondant the same circumference and height of the cake. Actually it was
slightly higher than the actual height of the cake, so it was more like 4-ish", and in a moment you’ll see
why. I rolled it with a pasta machine and it made it so much easier to roll a long
piece of fondant.
I then smeared a lot of shortening on the wax paper, I then attached the fondant to the paper, lining it up on the bottom part with a bit of an overhang. Once the fondant is secured to the paper I carefully flipped it over and using the paper as the guide, I cut out the extra fondant creating a straight line on the bottom.
I flipped it back to the fondant side and used the double diamond embosser and cutter to make the pattern. Ok this part actually took longest because I decided to cut out EACH diamond with a craft knife. I find that just using the cutter alone did not give a sharp cut. Let’s just say thank goodness that the cake isn’t too big. It still took a good hour to cut and remove all those diamonds. It’s also a good idea to cover the parts that are not being worked on with a plastic wrap to prevent it from drying out.

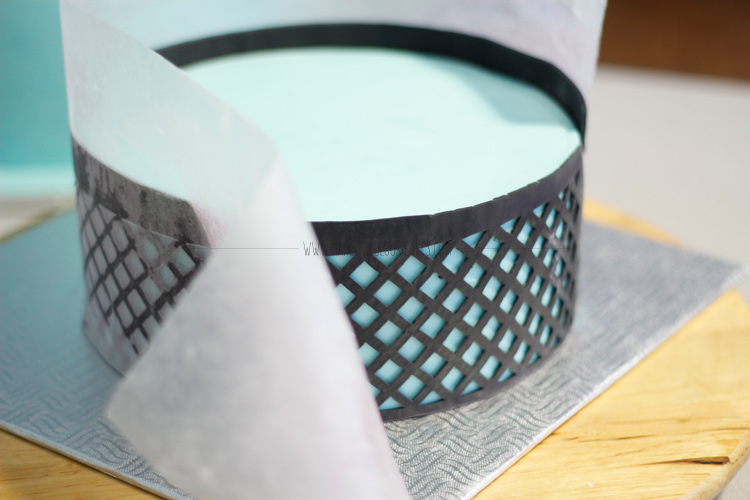
Once all the diamonds are out, I smeared some shortening on the fondant, carefully lift it up to the cake and lined up the bottom part of the fondant/paper with the bottom of the cake. I then used a fondant smoother to smooth it onto the cake. Then I carefully peeled back the waxpaper and voila! I then carefully cut the excess fondant on the top using the top of the cake as a guide. See, that's why we need that overhang of fondant in this part.
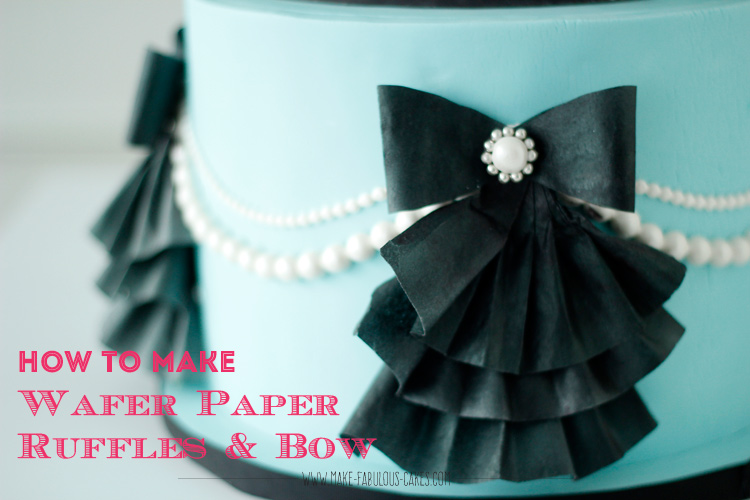
Because the method is a bit long and has a lot of pictures, I will make another post on how I made the bow and ruffles on the bottom tier. *Update* Here is the tutorial on how to make wafer paper ruffles and bow.
For now, let's check out dessert table.
Breakfast at Tiffany's Dessert Table
Here are more details of the Breakfast at Tiffanys’s inspired dessert table styled by the ever talented Heartmuch Event Styling & Décor.

Aside from Breakfast At Tiffany’s first birthday cake, I also made the Tiffany cookies and marshmallow pops for the table.


I just love the donut “rings”.

That's it for now, darlings.
Tune in for my next post on how to make the wafer paper bow and ruffles. *Update* Here is the tutorial on how to make wafer paper ruffles and bow.
Ta-ta,

You might also like:
Breakfast At Tiffany’s First Birthday Cake Top
- Home ›
- Birthday Cakes ›
- Breakfast At Tiffany’s First Birthday Cake
The images, tutorials and content on make-fabulous-cakes.com are protected by copyright laws. DO NOT distribute or copy the content without written permission. DO NOT edit, crop, or remove watermarks from any image or video. If you intend to use any of the text, templates or images within, it must be linked back to this site with credit given to www.make-fabulous-cakes.com. For questions contact us HERE.
Disclosure: Please note some of the links in this post may be affiliate links, I will earn a commission if you decide to make a purchase. This doesn’t cost you anything additional and I truly appreciate this support, thank you!

Hi, I'm Darlene. I'm the creator, photographer, baker, recipe tester of Make Fabulous Cakes. Welcome to my sweet world!
MORE ABOUT ME >>
most popular posts
 |
 |
 |
 |
 |
 |
Recent Articles
-
Fabulous cake decorating ideas, Recipes and Cake Pictures.
Mar 25, 24 09:44 AM
Cake decorating ideas with lots of cake tutorials, cake recipes and inspiration for beginners and the more experienced cake decorator. -
Harvest Buttercream Flowers Pumpkin Cake Online Class
Sep 14, 23 09:19 PM
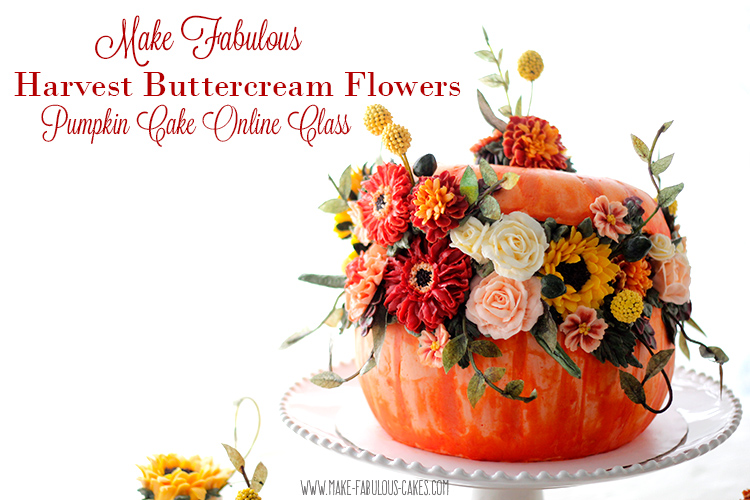 Make a beautiful Pumpkin Cake with fall themed buttercream flowers and wafer paper leaves and more!
 -
Rainbow Cupcakes
Sep 08, 23 12:13 PM
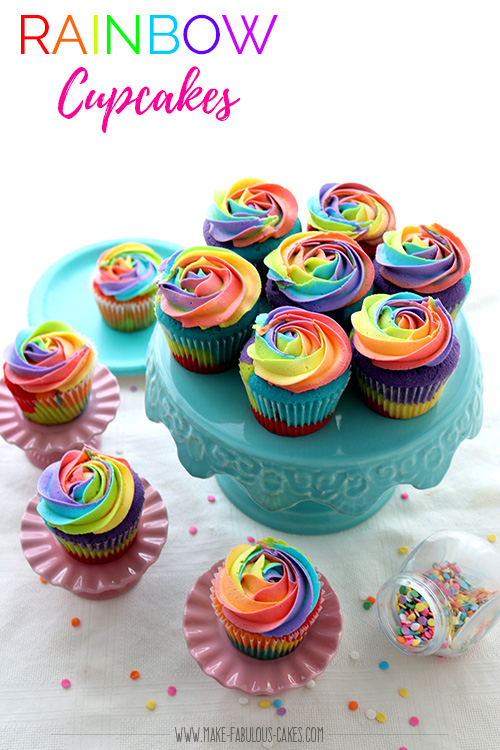 Discover the magic of rainbow cupcakes with this colorful and delicious recipe. Taste the rainbow today!"
online Classes

Featured in:
 |
 |
 |


