|


Castle Cake Tutorial
This post may contain affiliate links. Please read my privacy policy and disclosure.
I don't know why it took me so long to try my hand at making a castle cake. Maybe because the occasion never arises. Nah, if I really wanted to make one, I'll find a reason to make it. My nephew's birthday was coming up and he wanted a castle cake. After a bit of hesitation, I said yes to making one. Looking into his pleading eyes, how can I say no?

Ah... I think it's those turrets. For me, those turrets seems so daunting to make. I checked out a lot of castle cakes on the internet and I find different ways of making them. One popular way of making the turrets is by using ice cream cones. I've seen it made with the flat bottom cones and the pointy sugar cones.
As I am up for a challenge (or just a glutton for punishment), I decided to make my own turrets. And I found out it was not so hard at all.
I used the pointy sugar ice cream cones. I collect (among other things) the hollow carton tubes from rolls of paper towel, parchment paper and aluminum foil. I save them just in case...of projects like these. ;)
For this tutorial, I have simplified the steps on how to make a castle cake. Since the cake was for a boy, I used monochromatic shades of grey. You can easily make it a girly princess castle cake by using shades of soft pink and purple.
If you want it easy and skip the step of making your own turrets, there are ready made kits that are available. For a castle made for a princess, the Disney Princess Castle Signature Cake Kit is perfect for that. For a more formal castle fit for a queen (or king), the Wilton Romantic Castle Cake Set is the choice.
And the easiest of them all? How about baking the cake itself in the Nordic Ware Pro Cast Castle Bundt Pan ? That's absolutely fast and easy but still adorable!
How to make a castle cake
YOU WILL NEED
2 frosted cakes - 7" and 10" round
fondant
black food colour
ice cream cone
carton tubes (from empty paper towels, foil etc.)
1" round cutter
oval cutter
square cutter (1/2" and 2")
ruler
pizza cutter
MAKING THE TURRETSThe turrets can be made ahead of time. Use a carton tube and cut to the height you want the turrets to be. For this project, I cut 2 tubes to 6" long and one tube to 4". The 4" tube will go on the top and the other two will on the lower tiers of the cake.Mix a little bit of black food color into the fondant to make a gray. I wante to have a marble effect on the fondant. To achieve this, just simply not mix the color all the way thru.Cover the tubes with fondant. But before covering with fondant, cover the tubes with plastic wrap. This will prevent the tubes from absorbing moisture and therefore becoming soft.
Roll out the fondant and cut a rectangle. Moisten the tube with water as this will help the fondant to stick to it. Place the tube on top of the fondant and slowly roll the fondant around the tube. When the whole tube is covered cut the fondant with a pizza cutter.

Score the sides of the fondant covered tube to make it look like bricks.

Take three sugar cones and cover the bottom with a strip of fondant.

Color the fondant with three shades of gray. Cut out circles using the 1" round cutter. Moisten the under side of the circle using a brush dipped in water. stick the circle to the strip of fondant on the cone. Alternate the colors of the fondant.
Repeat adding circles on top of the previous layer until you reach the top of the cone.

Roll out a log of fondant and place on the top of the tube. Moisten with water and stick the cone on top of it.
TURNING THE CAKE INTO A CASTLE
Stack the 7" cake on top of the 10" cake using cake dowels on the bottom for support. Make sure that the cakes are well chilled before decorating.Roll out and cut a long strip of the darkest fondant to about 2" in height. Using a 2" square cutter, cut the top part of the strip on every 2" interval. To make it easier, I use the same cutter to measure the space. Carefully place on the top part of the cakes.To make the entrance door to the castle, cut out a half oval with the same height as the cake. Take small pieces of fondant and roll into a ball then flatten it with your thumb. Place around the door to make it look like stones.Use an oval cutter to cut out some windows for the castle. Cut the ovals in half and place on the sides of the cake and turrets.Cut out little squares using the 1/2" square cutter and use them to border the cake.
Insert straws into the cake where the turrets would go. Then place the turrets over the straws, hiding it. This will prevent the turrets from toppling over.
You might also like:


Castle Cake ⬆
- Home ›
- Birthday Cakes ›
- Castle Cake
The images, tutorials and content on make-fabulous-cakes.com are protected by copyright laws. DO NOT distribute or copy the content without written permission. DO NOT edit, crop, or remove watermarks from any image or video. If you intend to use any of the text, templates or images within, it must be linked back to this site with credit given to www.make-fabulous-cakes.com. For questions contact us HERE.
Disclosure: Please note some of the links in this post may be affiliate links, I will earn a commission if you decide to make a purchase. This doesn’t cost you anything additional and I truly appreciate this support, thank you!

Hi, I'm Darlene. I'm the creator, photographer, baker, recipe tester of Make Fabulous Cakes. Welcome to my sweet world!
MORE ABOUT ME >>
most popular posts
 |
 |
 |
 |
 |
 |
Recent Articles
-
Fabulous cake decorating ideas, Recipes and Cake Pictures.
Mar 25, 24 09:44 AM
Cake decorating ideas with lots of cake tutorials, cake recipes and inspiration for beginners and the more experienced cake decorator. -
Harvest Buttercream Flowers Pumpkin Cake Online Class
Sep 14, 23 09:19 PM
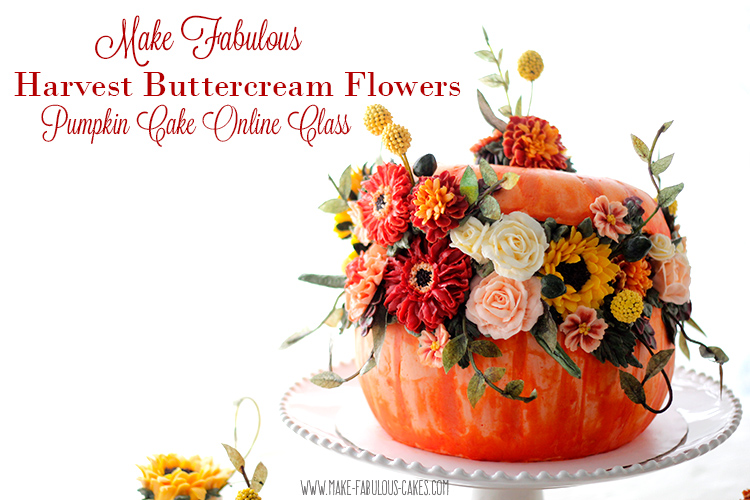 Make a beautiful Pumpkin Cake with fall themed buttercream flowers and wafer paper leaves and more!
 -
Rainbow Cupcakes
Sep 08, 23 12:13 PM
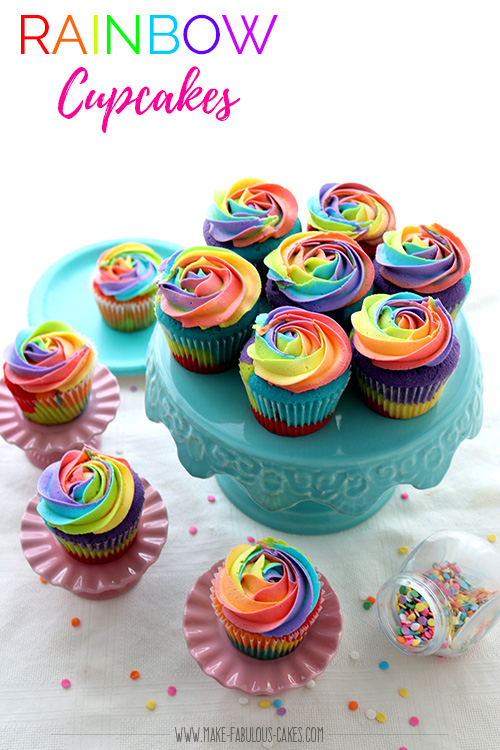 Discover the magic of rainbow cupcakes with this colorful and delicious recipe. Taste the rainbow today!"
online Classes

Featured in:
 |
 |
 |


